How to Make Wax Melts in Clamshells - Our Ultimate Guide for Beginners!

We wanted to cover the basics with you today to make you comfortable with the process and options available if you're still in the beginning stages of your wax melt making journey. Once you've mastered these basics, you'll feel more confident to move on to more advanced techniques.
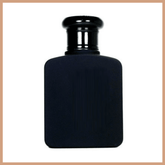
To help you get started, we're sharing a tutorial below for designer-perfume-inspired Savage-scented wax melts in clamshells made with Kerawax Paraffin Pillar wax in clamshells that you can use to get started. Of course, our tutorial is completely customisable, allowing you to put your own spin on this project but we'll share the choices that we made to make it easier for you to replicate in its entirety to ensure you've got the process down pat.
Jump straight in with our video tutorial below or keep scrolling for a written tutorial as well as further information to perfect your wax melt-making journey.
Can't watch? Our written tutorial is below along with even more information to guide you to customising our recipe with your own fragrance oils or wax.
How to Make Savage Scented Wax Melts in Clamshells

Difficulty Level: Beginner
Ingredients & Equipment

Ingredients
Equipment
- 3x Square Wax Melt Clamshells
- Digital weighing scales
- Stainless steel or glass pouring jug
- Milk or digital thermometer
- Metal spoon
- Melting pot
- Pan
- Kitchen roll to protect your work surface
- Nitrile gloves (or similar protective gloves) and an apron
- We’d also highly recommend the use of a chemical mask
Top tip: Before starting, make sure your work surface is covered and you’re wearing the correct PPE as stated in the materials needed above. This is to avoid skin/respiratory irritation from the fragrance oil and to protect your clothes from any splashes.
Step 1 Weigh Your Wax

Place the melting pot on your scales and turn on. Make sure the scales are set to weigh in grams. Weigh out 220g of wax.
Step 2 Melt Your Wax

Half fill your pan with cold water and place on your cooker/stove top. Sit the melting pot on top of the pan. Turn the hob/ring on and set to a medium - low heat. This is called the double-boiling method.
The water in your pan should be no more than halfway up your melting pots bowl.

When the wax starts to melt, place the thermometer in the wax to check the temperature. Once the wax has fully melted and reaches 80-85 degrees Celsius, take the pan off the heat and turn the hob off.
We'd recommend removing your thermometer in the melting pot whilst the wax is melting as it will get hot from the steam. Keep adding the thermometer to the wax at melting intervals to check it's not getting too hot.
Step 3 Add the Colour

Transfer the molten wax to your pouring jug. We’d recommend shaking the bottle of liquid dye for 30 seconds prior to adding it to the wax to ensure its mixed thoroughly and then add the colour to the wax immediately.
Stir the liquid dye into the wax until fully mixed – around 15 seconds. We used 4 drops to achieve the beautiful blue shade shown.
Remember, the colour of the liquid dye will appear much darker in the molten wax. You can check the colour it will be once set by dropping a small amount onto some white kitchen roll or the underside of a white bowl/plate. If this isn’t the colour you’d like, simply add a few more drops, stir and repeat the colour check process until you’ve achieved the desired shade.
Be sure to add your thermometer to your jug to keep an eye on the temperature of the wax as it cools down.
Step 4 Add Your Fragrance Oil

Wait until your wax cools to 75-78 degrees Celsius. Place the jug on your scales and turn on.

Add 22g of Savage fragrance oil and stir continuously for around 90 seconds to ensure the fragrance oil is thoroughly mixed into the wax.
Once stirred, allow the wax to cool until it reaches around 65–68 degrees Celsius.
Step 5 Pour the Wax Into the Clamshells

Once the wax has reached 65-68 degrees Celsius, you can start to fill your clamshells. Be careful to not overfill them!
We recommend pouring a small amount of wax into your clamshell first to check for any weak spots. Weak spots may show as the wax leaking out of the individual cells. If there are no leaks, you can proceed to fill them up.
Step 6 Leave to Set

Allow the wax to set fully before closing – usually around 2 hours. You'll want to then wait around 48 hours before you can enjoy using your creations!
What is a Wax Melt?
Wax melts are a wonderful way to fragrance your home with minimal effort. Wax melts are scented chunks or pieces of wax that release fragrance when liquified with heat. They are sometimes referred to as wickless candles and may be used in a wax melter with an unscented tealight candle or in an electric warmer. Unlike wicked candles, wax melts don’t evaporate, so you can enjoy the aroma time and time again until the fragrance has disappeared.
What Kind of Wax Should I Use for Wax Melts in Clamshells?
There are a vast number of different waxes on the market right now and no doubt choosing the right one can often cause confusion. For making wax melts in clamshells, we’d recommend using a pillar wax (as opposed to a container wax) as these are harder in form and have shrinking properties, so they’re easily removable from clamshells and moulds. There are also certain waxes that are available that have been specifically designed for making wax melts.
For our tutorial below, we’ve chosen to use Kerawax 4600 Paraffin Pillar Wax.
Which Scent Should I Choose for Making Wax Melts in Clamshells?
We have a huge range of over 500 professional grade, high quality fragrance oils that can be used in your wax melt making projects. There is no right or wrong fragrance you should use, and we believe fragrances are so subjective that its entirely down to personal choice so have fun having a look through the scent descriptions to find what appeals to you!
Due to the high strength of our fragrance oils, we advise a usage percentage of between 5%-10%. What does this mean? When considering the total weight of your finished product, you want to ensure that no more than 5%-10% of that total weight is made up of your fragrance oils.
How Much Fragrance Oil Should I Use for My Wax Melts?
With a recommendation anywhere between 5-10%, you might be wondering what percentage is best. Well, each oil's strength varies which means that some fragrances will perform better at a lower percentage and others will benefit from using at a higher percentage.
In fact, depending on your wax, the highest percentages don't always give you the strongest fragrance throw! As a result, we advise you test your wax melts at different fragrance loads so that you can find the percentage that performs best for the fragrance oil you’ve chosen.
You'll also want to check that your chosen wax can hold the fragrance oil percentage you wish to use. So have a look at the recommended fragrance loads and go from there. Some will work with slightly higher percentages and others with slightly lower.
How To Work Out the Fragrance Load for Wax Melts
In our wax melt tutorial, we’ve chosen to use our best selling Savage fragrance oil and we'll be using the maximum of 10% fragrance load. We know that each square clamshell holds 80g of finished product and as we'll be filling three clamshells, we would need a total of 240g of wax and fragrance oil combined.
We know we want to use 10% fragrance load meaning that 10% of the overall mixture will be fragrance oils and the rest will be wax.
If we use 220g of wax and 22g fragrance oil, we will end up with a total mixture of 242g (220g x 0.10 = 22g) which is just slightly over the 240g we will need to fill our clamshells. With this calculation, you’ll have a little left over but it's always better to have too much than not have enough.
Any extra may be added to a small mould or a few cells of another clamshell (if you have one) so it’s not wasted.
Top tip: You always want to measure your fragrance oils in weight, not by millilitres. Why? Because millilitres is a volume measurement and not a weight measurement. Oils will often vary in their viscosity (meaning some will be lighter and some heavier) so even at the same volume, you will find they will be different weights. To account for this and to make it easier, every ingredient including your wax should use the same unit of measure - in this case, grams.
Which Dye/Colouring is Best to Use For Wax Melts?
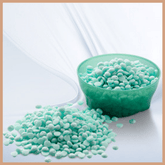
There are various dyes out there specifically designed for use in wax. These come in the form of liquid dye or dye chips. There’s also mica powder which adds a lighter colouring to wax but is predominantly used to add sparkle effects to your wax.
For our Savage scented wax melt tutorial, we’ve opted to use liquid dye. Our liquid dyes are highly concentrated so a little really does go a long way. They require minimal effort, simply give the bottle a little shake before using and add the desired drops to your molten wax.
Can I Use My Wax Melts Straight Away?
All waxes have a recommended cure time. What do we mean by this? The curing time is the amount of time (normally in days) that you leave your made-up wax melts to set before you can use them.
Curing is a process which allows the fragrance oil molecules to bind fully with the wax molecules. When your wax melts are left to cure for the full recommended time frame, you'll get the the maximum fragrance throw once placed in your melter.
Some waxes (like paraffin) have a cure time as little as 48 hours and others are advised to leave at least 1-2 weeks (like soy). It's important to know the recommended cure time of your wax as this will ensure the best performance of your wax melt and a stronger scent when in use.
The paraffin wax we’ve chosen for our wax melt tutorial only has a 48-hour cure time, so the wait between making and using your wax melts isn’t too long. There’s nothing worse than having to wait to try out your creations!
If you're thinking of creating wax melts in moulds, the process is very similar but you may find it helpful to check out our tutorial for Making Wax Melts in Moulds here.
Want to make this even easier? Have a look at our Wax Melt Making Kits to get you started.
We hope you enjoyed this tutorial and learned how easy it is to make your own scented wax melts in clamshells. Considering selling your creations? You'll want to read our Ultimate Guide to Selling Candles and Wax Melts here.


5 Comments
I have just purchased my first order through craftovator and this tutorial was perfect for explaining how to get started. Very informative and easy to follow
Really good information
I have just purchased my first order through craftovator and this tutorial was perfect for explaining how to get started. Very informative and easy to follow
Really good information
Leave a comment
All blog comments are checked prior to publishing