


How to Make Marble Wax Melts With Wow Factor!
Plain or single coloured wax melts are great but have you ever wondered about adding a little artistic flair to your wax melt creations? If so, you’ve come to the right place. This step-by-step tutorial is aimed at showing you the process of creating marble swirls in your wax melts. Whether you work with clam shells or moulds, this effect will certainly bring some WOW factor!
Our beginner’s tutorial, How to Make Wax Melts in Clamshells will guide you through the process of making wax melts and provide further information if you’re new to the wax making community.
We recommend mastering making simple wax melts first before working with marbling techniques but if you're ready to jump in, our video will take you through the basic steps or you can read on for a more detailed written tutorial.
Note: This tutorial is totally customisable so you can either use the products we have linked to below or work with your usual wax, fragrance oils and colour dyes using the same technique!
Difficulty Level: Beginner to Intermediate
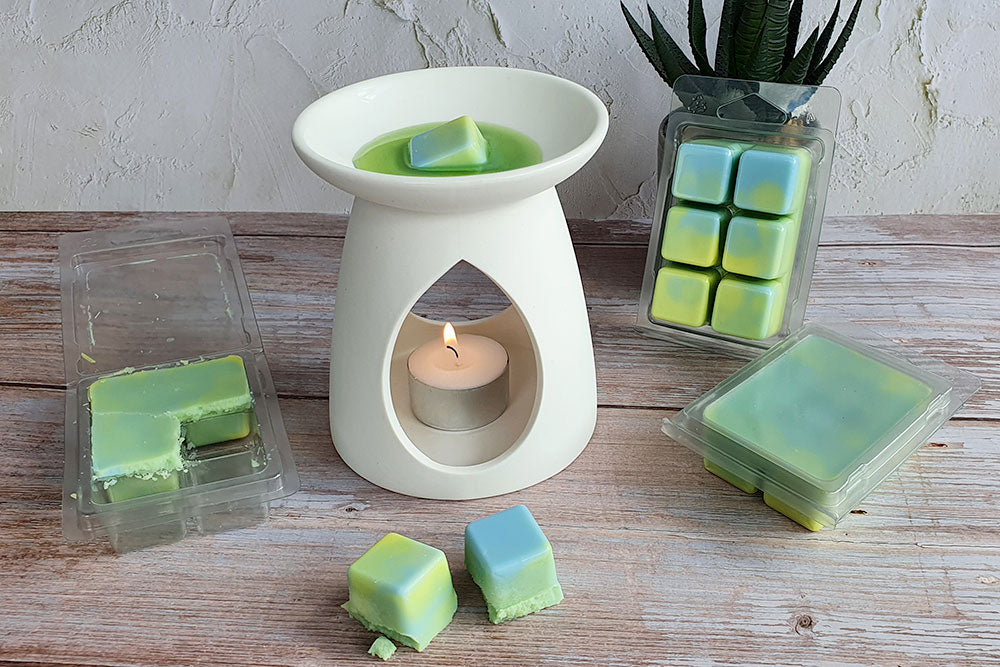
Makes: 3 Square Clamshells
Materials and Ingredients

Ingredients
- 220.8g Golden Wax 494 Soy Blend Wax Melt Wax
- 19.2g Citrus Zest Fragrance Oil
- 10ml Bright Yellow Candle Liquid Dye
- 10ml Sky Blue Candle Liquid Dye
Materials Needed
- 3 x Square wax melt clamshells
- Digital weighing scales
- 2 x Stainless steel or glass pouring jugs
- Milk or digital thermometer
- Metal spoon
- Melting pot
- Pan
- Kitchen roll to protect your work surface
- Nitrile gloves (or similar protective gloves) and an apron. We’d also highly recommend the use of a chemical mask
Top tip: Before starting, make sure your work surface is covered and you’re wearing the correct PPE as stated in the materials needed above. This is to avoid skin/respiratory irritation from the fragrance oil and to protect your clothes from any splashes.
Step 1 – Weigh Out the Wax

Place the melting pot on your scales and turn on. Make sure the scales are set to weigh in grams. Weigh out 220.8g of wax.
Step 2 – Melt the Wax

Half fill your pan with cold water and place on your cooker/stove top. Sit the melting pot on top of the pan. Turn the hob/ring on and set to a medium - low heat. This is called the double-boiling method.
Top tip: The water in your pan should be no more than halfway up your melting pots bowl.

When the wax starts to melt, place the thermometer in the wax to check the temperature.

Once the wax has fully melted and reaches 80 - 85 degrees Celsius, take the pan off the heat and turn the hob off.
Top tip: Don’t leave your thermometer in the melting pot whilst the wax is melting as it will get hot from the steam. Keep adding the thermometer to the wax at melting intervals to check it's not getting too hot.
Step 3 – Add Fragrance Oil

Transfer the molten wax to one of the pouring jugs. Place the jug on your scales and turn on. Add 19.2g of Citrus Zest fragrance oil once the wax reaches 75 – 78 degrees Celsius.

Stir continuously for around 90 seconds to ensure the fragrance oil is thoroughly mixed into the wax.

Once mixed, transfer around half of the fragranced molten wax to the other pouring jug. It doesn’t matter if you don’t get the wax equal between both jugs.
Step 4 – Adding liquid dye
We’d recommend shaking the bottle of liquid dye for 30 seconds prior to adding it to the wax to ensure its mixed thoroughly.

Add the liquid dye as soon as the wax is distributed between both jugs. We added 3 drops of Bright Yellow Liquid Dye in one jug and 2 drops of Sky Blue Liquid Dye in the other.

Stir the wax thoroughly in each jug to completely dissolve and mix the dye.
Step 5 – Pour the Wax in Both Jugs

Once you’ve added the liquid dye, the wax should be around 63 – 65 degrees Celsius and you can start to fill your clamshells, being careful to not overfill them.

Holding a jug in each hand, pour a bit of each jug of wax in turn until they’re just below fill level. You can pour as much or as little of each colour into the clamshell as you like, the choice is yours. You will notice a third colour will likely emerge as a mix of both colours, adding to the marble effect.
Top tip: We recommend pouring a small amount of wax into your clamshell first to check for any weak spots. Weak spots may show as the wax leaking out of the individual cells. If there are no leaks, you can proceed to fill them up.
Step 6 - Allow to Set and Cure
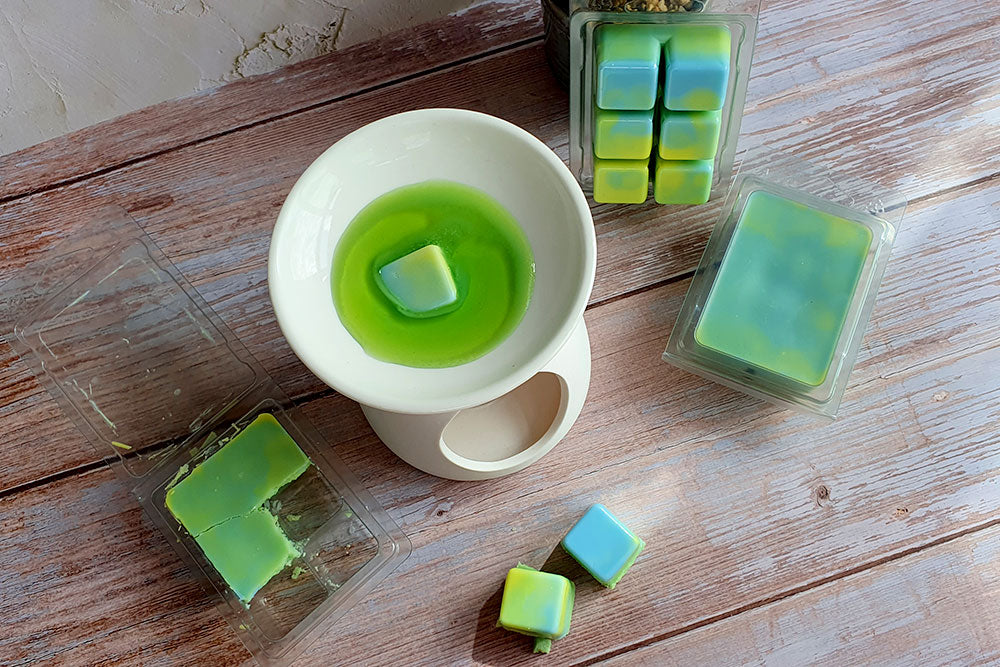
Allow the wax to set fully before closing the clamshells – usually around 2-3 hours. Your wax melts are now made and will be ready to use in 7-14 days. We would recommend allowing at least 7 days cure time however, the longer the cure time, the better with this wax.
You may notice some frosting in your wax melts when using Golden 494 wax, however, this is perfectly normal for natural soy waxes and is purely aesthetic. It won’t affect the performance of your wax melts.
Is Liquid Dye or Dye Chips Better for Marble Wax Melts?
Whilst dye chips may be your first choice for colouring your wax melts, to get the full effect of your marble technique, we would recommend using liquid dye. These are simple and easy to use, just shake the bottle and add the desired drops to your molten wax. With dye chips prone to pigment spots due to not fully dissolving, the marble effect may not work as well.
We'd recommend experimenting with this technique, varying how much liquid dye you use to achieve your desired colour mix and overall marbling effect.

We hope you enjoyed this tutorial and learned how simple it can be to add a marbling effect to your wax melt creations.
Considering selling your handmade wax melts? Check out our Ultimate Guide to Selling Candles and Wax Melts here.
1 comment
Hi
Just wanted to say thanks for the video, I’m definitely going to try this.